Automatic Mushroom Farm + Seasonal 6 Pack

R 2,999.00 ZAR
R 4,800.00 ZAR
{price}% OFF Sold out

★★★★★ 4.8 (300+ reviews)

✓ Stocked in Pick n Pay, Spar & Hadeco
  • Ships in 1–2 days across SA

  • Grows in 10–15 days

  • 2 - 3 flushes over 90 days

  • 300+ five-star reviews


Ships in 1-2 business days
  • Guarantee Safe
    Checkout

trust_2dea69ed-7223-44f3-828d-a80bc0f3aef4

The Mushroom Box info:

Benefits / About Section

Automatic Mushroom Farm + Seasonal 6-Pack Mix - Grow Your Own Gourmet Mushrooms at Home


📋 Detailed Growing Instructions 

IMPORTANT - Before You Start: Join our Mushroom Growers Group within 30 days of delivery to activate your guarantee. One small mistake can affect your harvest—our experts help you avoid it.

Step 1: Choose Your Location

  • Indirect natural light (kitchen counter, shelf near window)
  • Good air circulation
  • Room temperature 15-25°C
  • Optional: Use our mushroom grow tent for stable, more consistent results

Step 2: Make the Cut

  • Cut an X-shaped slit where indicated on box at the front 
  • pro tip: fold the boxes lid inwards and cut an opening on top as well for 2 cluster to grow at once.
  • Size: 5-8cm across
  • Post a photo in the growers group if unsure!
  • If using grow tent: Place boxes inside and zip up to trap moisture

Step 3: Initial Growth (Days 1-21)

  • Mist 2x daily with light spray (don't soak)
  • Keep environment humid
  • Be patient—first pins appear 4-21 days depending on variety
  • Post updates in group so experts can guide you

Step 4: Active Growing Phase

  • When mushrooms are visible, increase fresh air
  • Open tent up fully and open nearby window
  • Continue misting 2x daily
  • Monitor daily and ask in group if you see:
    • Mushrooms looking dry → may need more misting
    • Long & stemmy → need more fresh air
    • Soggy or wet → reduce misting
    • Green mold → remove box immediately, post in group

Step 5: Harvest (CRITICAL FOR SECOND FLUSH)

  • Harvest BEFORE spores drop to enable additional flushes
  • Ready when caps flatten out but edges haven't curled up yet
  • When in doubt, post a photo in the group—timing is everything!
  • Twist and pull entire cluster from base
  • Late harvest = spore drop = no more flushes possible

Step 6: Storage

  • Store in breathable container (paper bag, not plastic)
  • Refrigerate up to 5-7 days
  • Best eaten within 1-3 days of harvest
  • Find recipes on our Resources Page

Step 7: Attempting Second Flush (Not Guaranteed)

  • Only possible if you harvested before spore drop
  • Place harvested box in fridge for 7-10 days to rest
  • Remove and repeat misting process
  • Maintain ideal conditions (proper humidity, air flow, temperature)
  • Second flush is smaller but still delicious
  • Some boxes produce 2-3 flushes total if conditions are perfect

Step 8: After Final Harvest

  • DON'T THROW AWAY!
  • Break apart and add to garden soil
  • Enriches soil quality and structure
  • May produce wild mushrooms in shaded, moist areas months later

Pro Tips from Our Growers:

  • Take photos daily and share progress in group
  • Morning misting is more important than evening
  • A small fan nearby helps with air circulation
  • Patience is key—resist the urge to over-mist
  • Ask questions BEFORE problems develop


Detailed Grow Guide:

s1
1. Find a shelf/counter inside to grow your mushroom boxes.

Avoid direct sun and wind to prevent water from escaping your box.
mb_grow_group
Optional: Join Our Growers Support Group.

Post photos and get real time feedback.
s2
Cut an X on the front of your box.

This will trigger the mycelium to get ready to grow mushrooms
(Within 1-30 days)
s3_51526ea5-97d6-450a-b673-67e95260c5c3
Maintain a suitable environment for your mushrooms

They like shade, fresh air and humidity.

s4
Use a spray bottle to lightly spray them to keep them happy.

(Don't drench them)


mbg6_c05e9c94-aa5b-460e-a9e7-475c56af4182
A humidifier helps them thrive on auto pilot


s6
Once they fan out fully, twist and pull them off right away.

Leaving them too long will let them drop spores and decay (this can  happen within 24 hours)

s6_8b51ba30-a421-419c-963a-80b37c7f2233
Pro Tip: 

Cook your mushrooms immediately after harvest for maximum flavor and benefits

mb_-_kebab
Check out our resource page to see our world class mushroom recipes

Gemini_Generated_Image_20e8rn20e8rn20e8
Bury the substrate in your garden to let the mycelium grow wild. If conditions are sufficient, more mushrooms may grow!

Recipe Suggestions

Find All The Recipes & Videos On Our Resource Page:
Gourmet_Kebabs_Blog
Chestnut_Mushroom_Toast_recipe_blog_banner
Blog_banner_-_BO_Recipe
Blog_Banner_-_Lionsmane_steack_sandwitch_recipe

1st Flush Guarantee

✅ First flush guaranteed - or we replace it. 

Join our 2000+-member Growers Group for expert support at every step. (Recommended - most growers who join get 2–3 harvests.)

How to grow More Oyster Mushrooms

gm1

How to turn 1 Oyster Mushroom Box into a bucket load of mushrooms.
gm2

Step 1: 
Drill holes 15cm apart around the side of a bucket.
gm3

Step 2: 
Use rubbing alcohol to sterilise the inside.
gm4

Step 3: 
In another bucket (without holes)
fill it up with chopped straw.
gm5

Step 4: 
Submerge in boiling water to kill any other mushroom spores inside.
gm6

Step 5: 
Put the lid on and let it sit for 30 minutes.
gm7

Step 6: 
Let the water drain out overnight. grab a handful and squeeze. There should be no dripping water.
8packimage

Step 7: 
Now its time to grab your mushroom box. make sure the block inside is fully covered with white mycelium.
gm8

Step 8: 
In the 1st bucket (with holes), place a layer of straw, then a layer of mycelium until the buckets full.
gm9

Step 9: 
Place micropore tape over the holes to prevent other spores from landing on the substrate.

gm11

Step 10: 
Then place the bucket in a cool, dark cupboard for 2-3 weeks until the white mycelium has grown over the substrate.
gm12_e460aaea-3a38-4d2b-874b-618c828a5933

Step 11: 
remove the micropore take to let the mushrooms emerge.
gm13

Step 12: 
Place your bucket somewhere away from sunlight, with lots of fresh air and humidity.
gm14

Step 13: 
Within a couple days from pinning, your mushrooms will be ready for harvest!

FAQ's

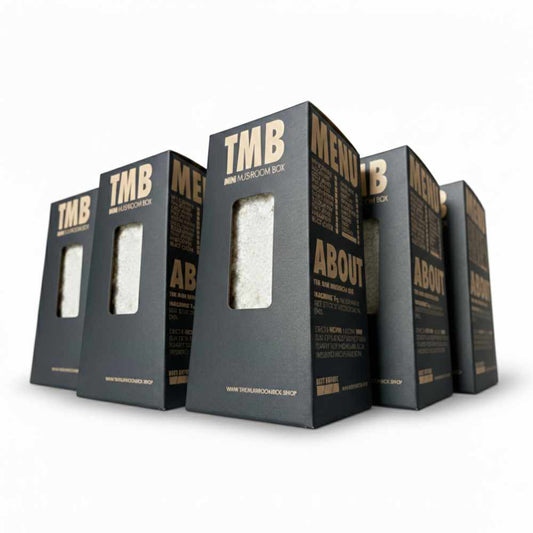
How long can i store them?

We recommend storing your boxes in a cool, dark spot for no longer than 3 months before using them. They can withstand storage for up to 6 months in the fridge but fresh is always best.

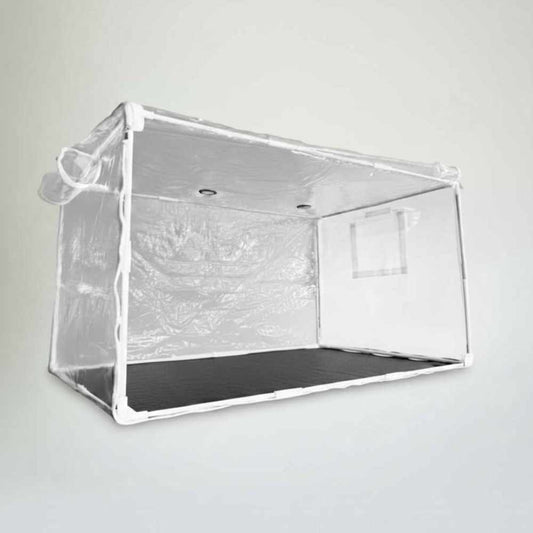
Do I need any special equipment?
No. Just water in a spray bottle and a spot with indirect light. Optional: our mushroom grow tent speeds up growth.

Why do I need to join the Facebook group?
Growing mushrooms is simple, but small mistakes happen. Our group gives you real-time expert support to ensure success. It's like having a mushroom hotline—and it's required for our guarantee.


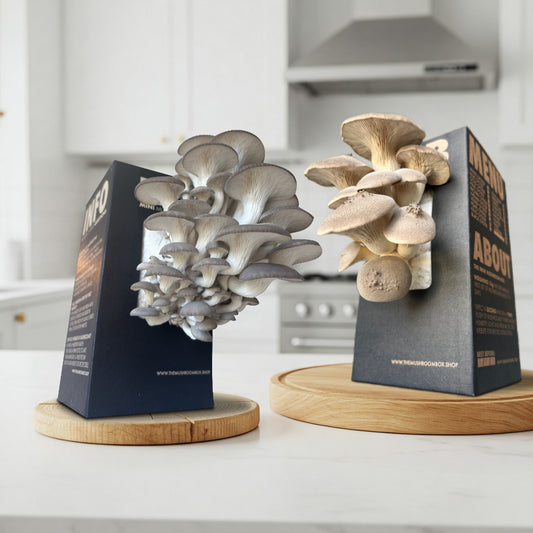
Will I definitely get 2-3 harvests per box?
The first flush is guaranteed (with group support). Additional flushes depend on two critical factors: (1) harvesting before spores drop, and (2) maintaining ideal humidity, temperature, and air flow. Many growers get 2-3 flushes, but we only guarantee the first.


How do I know when to harvest to get more flushes?
Harvest when caps flatten but BEFORE the edges curl up and release spores. Post a photo in the group—we'll tell you exactly when!


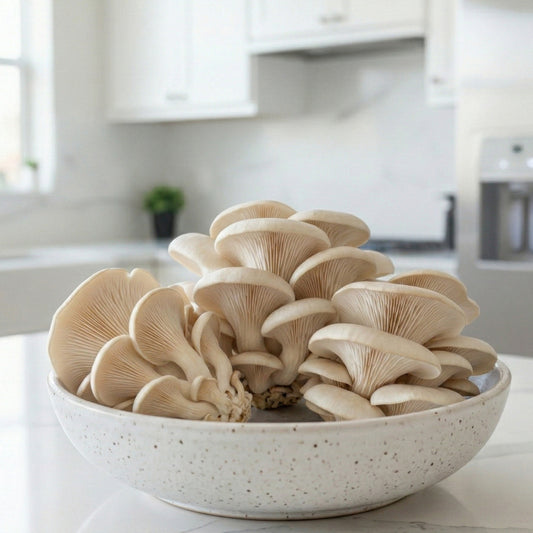
How long do fresh mushrooms last?
5-7 days in the fridge in a breathable container (paper bag). We recommend cooking within 2-3 days for peak flavour.


Can kids do this?
Absolutely! It's a popular school science project. Adult supervision recommended for the cutting step.


What do I do with the substrate after?
Add it to your garden—it's excellent compost! Wild mushrooms may even grow in your yard later.


🛒 Ready to Grow?
Ships in 1-2 business days | Free delivery over R900 | First flush guaranteed
👇 Add to Cart and join 10,000+ South Africans growing their own gourmet food at home.


Remember: Join our Growers Group within 30 days to activate your guarantee!


Very IMPORTANT

Subscribe Now

For real time instructions on your grow, Access to our community of helpers & mushroom resources.